
26 Aug Paper Daisy Flower: Collection Of The Best Handmade DIY Tutorials
Calling all paper crafters! Would you like to learn how to create a paper daisy flower? Many paper crafters love creating paper flowers with beautiful paper. The texture and weight of crafting paper have a therapeutic effect as you score, fold, and fasten various pieces together to create something new. In fact, paper crafting is so popular, there are manufacturers who produce entire lines of print and textures for themed projects, many of which are perfect for flowers. But, let’s keep this post rather simple. Here are several ways to create paper daisies.
The Daisy
Daisies often are used to suggest innocence, joy, and simplicity. Dating to ancient Celtic myths, the daisy was the flower that represented Freya, the goddess of beauty and fertility. It is often seen as representing new beginnings. A paper daisy makes it possible to bring this sense of joy into your crafting projects.
The sunny yellow center of the daisy, surrounded by rays of white petals, brings a touch of sunshine to any flower bed or bouquet. This is the flower usually portrayed in the classic “She loves me, she loves me not” icons. In Renaissance paintings, you will see the daisy replace the lily in paintings of the Christ child. The resilience of this long-blooming flower is noticed by gardeners, and it is valued for its hardiness and the brightness it brings to flower beds. They are perennial flowers, so they grow back after the freezing winters.
Paper Daisy Flower Tutorials
I have picked out 3 simple paper daisy flower tutorials that are all easy to make. The first tutorial shows you how to make a daisy chain, which is the easiest and fastest to make. It can be used to make a head band or table decoration. The second tutorial has is also very simple, but presents a unique twist on the shape of the daisy. The last tutorial teaches you how to make a very realistic paper daisy flower. It's a little more complex, but still simple to make.
Paper Daisy Chain
Are you ready to celebrate spring with a classic daisy chain? Here is a great tutorial to help you make a variety of sizes of daisies from Martha Stewart. Cut two petal discs for each flower you plan to add to your daisy chain. Once you have the 2 discs cut out, glue them together with the petals offset so that you can see the bottom petals, too. Then, glue a center into the paper daisies. This center may be a small disc of paper, button, glitter, or anything else your imagination can come up with. Once the paper daisies are complete, attach them to your string.
The string may be twine, yarn, or some other type of cord. To get the paper daisies to stay in place, use an additional disc of paper on the back. You will lay the flowers face down and glue the string to the back of the flower. Then, put glue on the back of a disc of paper cut to the size of a quarter. Put this disc on the back of the flower, on top of the string. There, the paper daisies are double-glued! Shape the petals by curling or folding them.
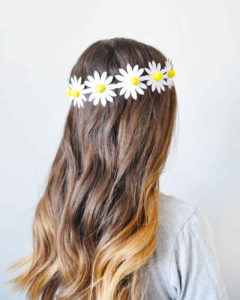 Image from Marthastewart.com
Paper Shasta Daisies
At Craft Stylish, you will see a much simpler pattern for paper daisies. Simply select a circle size for your initial pattern. If you want small, dainty daisies, select a small item for a template, such as a coin or bottle cap. If you want larger flowers, choose a drinking glass. You will trace the circle as many times as you want, planning on two discs per flower.
Once you have your discs cut out, you need to cut in the petals. You’ll make 8 cuts from the outer edge toward the center. This creates the basic petal that you will fold and shape to make your paper daisy. Now, fold each petal in half, down the length of the petal. Be careful not to tear the center. Once you have the petals folded, you can snip the outer corner off to round off the shape. The picture on the website shows square tips on the petals. Layer 2 of the discs, alternating the petals so that it looks fuller. Add a bit of glue or a glue dot to the center of the bottom disc, and attach the top disc.
For a different kind of center, take a strip of yellow paper that is about 1/8th inch wide and 18 inches long. Wind it into a tight button shape. This will be glued to the center of each flower. Attach your floral stems to the back, and you have beautiful paper daisies!
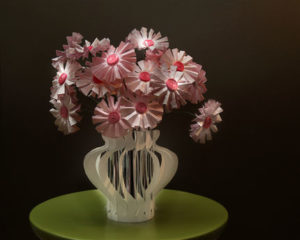 Image from Craftstylish.com
The Classic Paper Daisy Flower
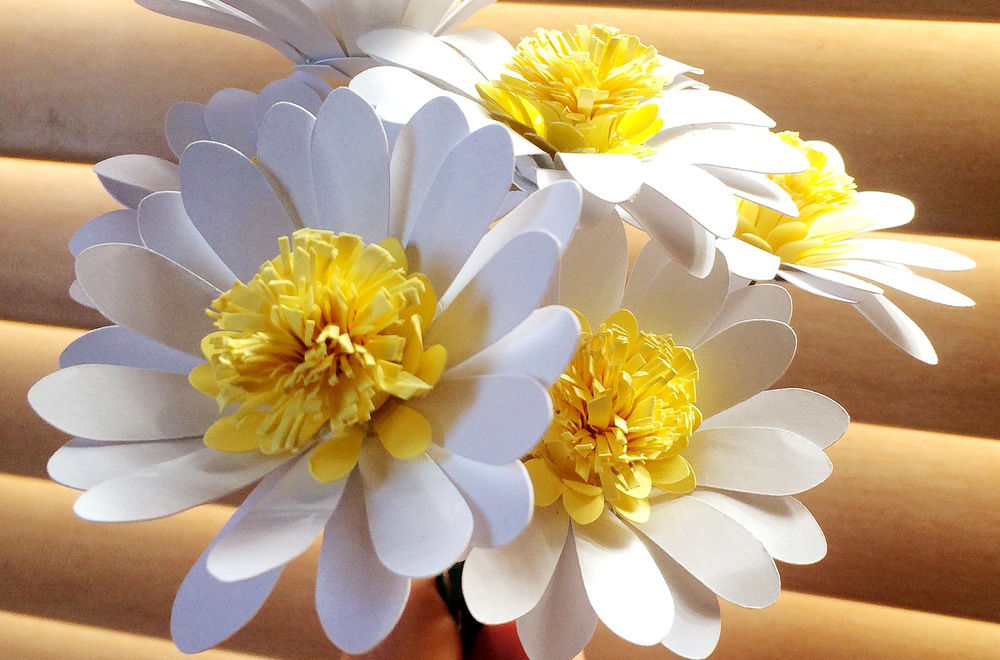
At Only Just Becoming, you can find a great template, or pattern, along with thorough instructions for creating a paper daisy that makes the most of the flower’s simple petals and intricate center.
Using the free daisy template provided, you will need two large discs of petals, two small discs of petals, and one strip of paper. You’ll need to cut the strip into fringe, making the cuts very close together. Roll the fringe up and snip the corners off to make a dome. Curl the petals of the large discs with your scissors to give the petals some shape. Then, glue the two large discs in the center, slightly rotating the top disc so that the petals on the bottom disc show through.
With the small, yellow discs, you are going to create the foundation for center of the daisy. Cut the center discs into sections of 3 petals, then place them around the center of the daisy, overlapping some petals to create a natural look. Once you have the yellow petals in place, glue the domed fringe into place.
To create a stem, take a length of floral wire and make a circle at one end. Glue the wire to the flower. Now, take a small circle of paper, either white or green, and cut a slit in it. Slide the slit over the wire, and create a cup against the bottom of the flower. Glue this into place, put a few of them together to create a bouquet of daisies.
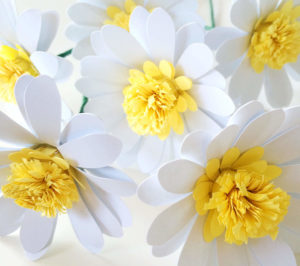 Image from Onlyjustbecoming.com
Creating paper daisies is a great way to decorate a room or let a loved one know you are thinking of them. If you get a chance to make any of these flowers, please let me know how your flower turned out and leave a comment below.
I reviewed the best tutorials for 10 other types of flowers. Click on the links below to check out the other flower tutorials.
- Roses: Roses symbolize love and are perfect for Valentine’s day, Mother’s day, weddings and birthdays for that special someone.
- Sunflower: Sunflowers can brighten anyone’s day and reminds us of the warmth of summer.
- Orchids: Orchids are delicate and denote beauty and luxury. They make wonderful decorations for gifts and hair accessories.
- Calla Lilly: Calla Lilies are elegant and simple and work well for modern decorations. If you want to make a lot of flowers for an event or party, then calla lilies are great to make.
- Tulips: Tulips represent springtime and are another easy flower to make with children.
- Stargazer Lily: Stargazer lilies are great for bouquets and work well with other flowers.
- Iris: Iris’ suggest purity and are one of the most beautiful blue or violet flowers.
- Bird of Paradise: If you want to make a tropical themed flower, the Bird of Paradise is your best bet.
- Carnation: Carnations are easily recognized, fun to make and are also great for Mother’s day and Valentine’s day.
- Lotus: Lotus flowers imply compassion, love, purity and rebirth. They are the most spiritual flower.
No Comments