
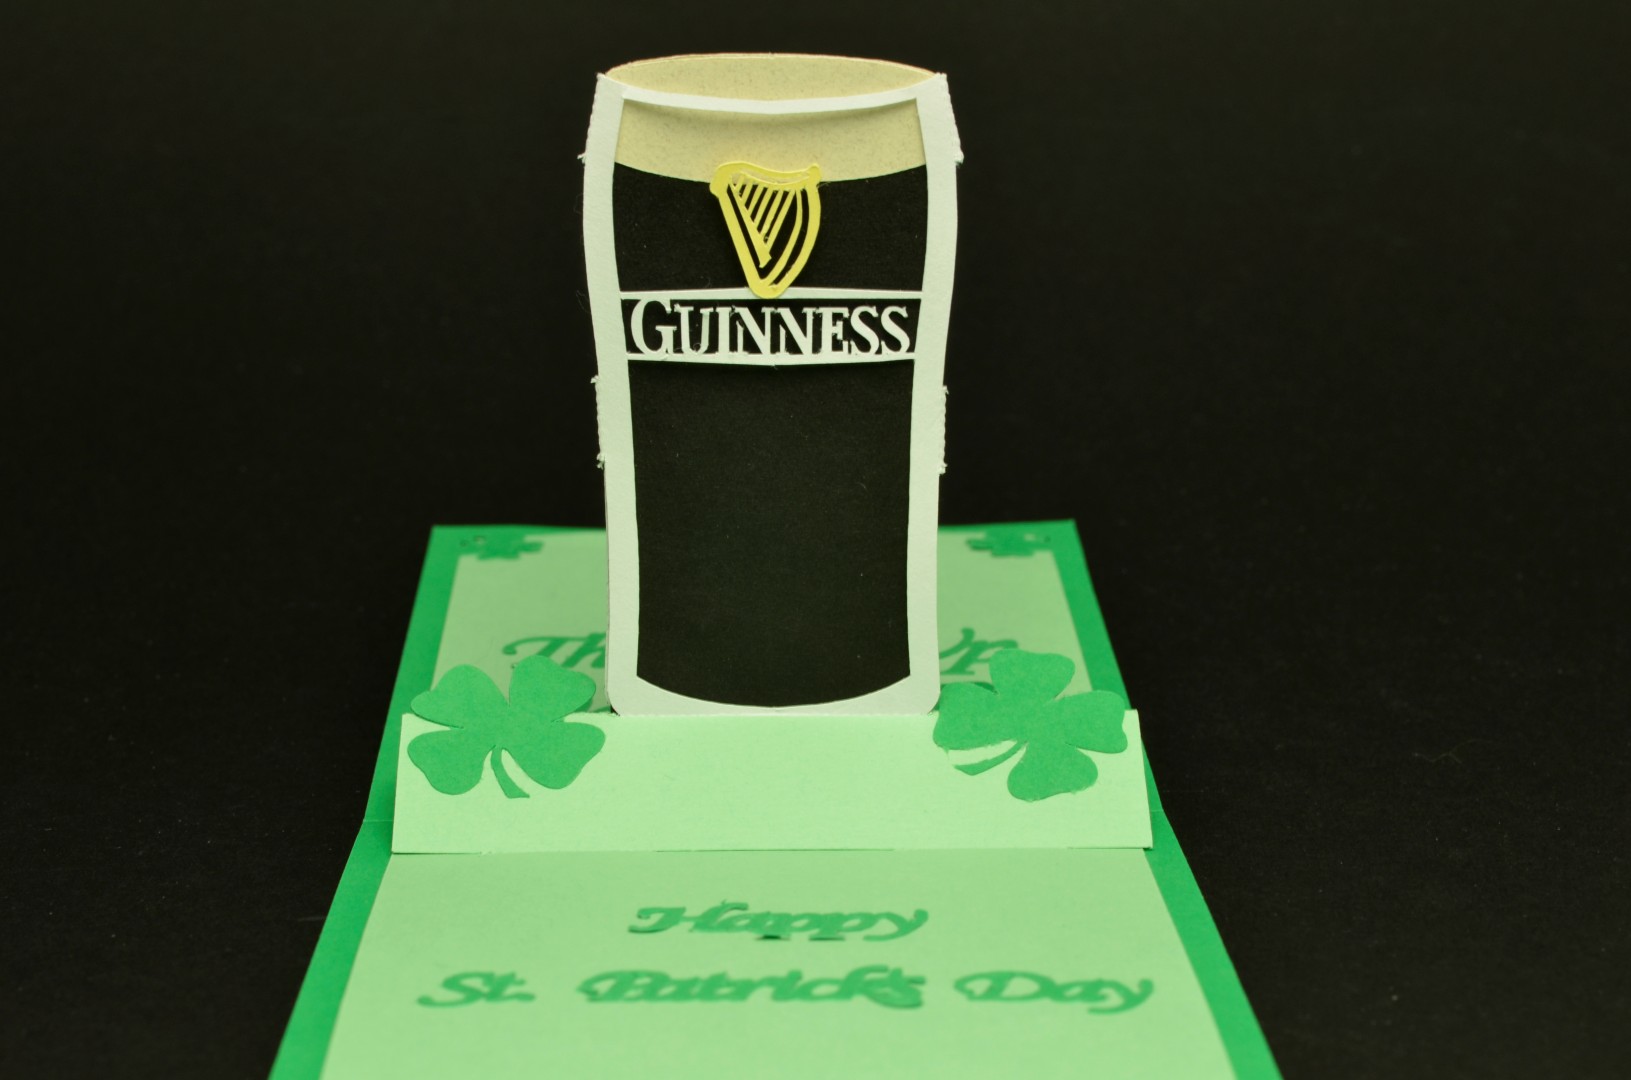
17 Mar St. Patrick’s Day Pop Up Card: Guinness Glass Tutorial
Do you know someone celebrating St. Patricks's day by having a pint of Guinness at the local Irish pub? Here is the tutorial for making the St. Patrick's Day Guinness Glass Pop Up Card. This card is also a great card to give your father, brother, husband or boyfriend. What's unique about this card, is that the glass will fill up as you open in. As some of you frequent visitors know, I like to make cards that move or are animated. This card is relatively easy to make, but requires very precise cutting. I would recommend using a cutting machine like the Silhouette Cameo. The logo and lettering require some patience to cut out. You can use this same concept to make different drinks. Here is what the card looks like:


If you want to see more images or a video of the card in action click on my previous post: Guinness Glass Pop Up Card.
Here is the video with instructions on how to make this card. I didn't realize that my camera was zoomed in so much, so the top of the video is a little cut off.
The video is probably going to be easier to follow than these instructions but if you don't have 9 minutes to watch it, then read these quick tutorial:
- Purchase the template from the template store here: Guinness Pop Up Card Template.
- Print out the template and cut out the parts using different colors. I used different shades of green for the backing and inside card. Then I cut out the cup out of white card stock, the beer out of black, the head out of a tan sheet of paper, harp out of yellow, clovers out of both shades of green and the text out of dark green card stock.
- I would recommend using a cutting machine to cut out the parts. I used the Silhouette Cameo for the glass. Be patent with the logo because it's pretty small and it may take a few tries to cut it out. I cut out a separate yellow harp because I messed it up when cutting it the first time with the glass. Here are some tips for cutting it out using a machine: make sure your mat is tacky (use a new cutting mat, I had to), use a sharp, new blade, cut using a slower setting. This will help prevent snagging when cutting out the intricate parts.
- Fold the glass along the center, the bottom tabs and the side tabs (for gluing). Fold the glass base (light green) for the glass.
- If you are going to glue a separate harp logo on, then cut off the harp attached to the glass.
- Insert the glass bottom tabs into the light green base.
- Glue the beer head onto the beer. I glued the head a tiny bit above the beer so that you cant see the black beer on the edge.
- Insert the beer from the top of the glass down into the light green glass base. Make sure the beer slides smoothly.
- glue the tabs on the side of the glass. Again, make sure the beer slides smoothly and that it is not glued to the glass. Be careful, don't put too much glue! I recommend using a glue stick. it is easier to apart the glue if you mess up.
- Glue the bottom glass tabs to the light green glass base. You can use a glue stick for this also.
- Glue the yellow harp to the top of the “Guinness” text. I used Elmer's glue because it's pretty permanent. Be very careful not to putt too much glue, otherwise you will glue it to your beer!
- Fold the inside card (light green) and assemble the glass base/beer by inserting the tabs into the slots. There are 4 slots for the glass base. Start with 2 one one side first, then insert the bottom of the beer. Finish with the other 2 tabs on the other side of the glass base. Now you can fold the card and test the sliding mechanism. Here's a tip if your beer catches at the top of the glass (front): slightly bend or curve the top corners of the beer toward the back of the glass. The back of the glass edge is thicker, so it will be harder for the beer corners to catch.
- Fold the card backing down the middle and make sure that the clovers are all cleanly cut out at each of the corners.
- Insert the inside card into the backing at the four corners. Carefully close the card to make sure it closes flat and that all corners are carefully inserted correctly.
- Glue the rest of the clovers and text inside and outside the card. You're done!
Happy St. Patty's Day!
Eden
Posted at 15:27h, 18 MarchHiya
Rob I LOVE this! I have been waiting for the tutorial and will also be waiting for the written instruction. Your work is so charming and very much appreciated!
cheers and best regards
Eden x
Eden
Posted at 15:34h, 18 MarchSorry…I meant to type Rich…not Rob…x
Dee
Posted at 16:28h, 19 MarchI love all your cards and paper crafts. I hope you will come link up to The CSI Project this week. We are a craft challenge blog and this week’s challenge is Embossing and paper crafts. Come link up beginning Wednesday and come see tutorials Monday- Wednesday. We have a weekly giveaway and you just might win the challenge.
http://www.thecsiproject.com
Every week is a new craft challenge. Hope you will come on over!!!